I love pinterest. I
find so many wonderful ideas on those pages. Ideas that sometimes solve
annoying problems. Things that just make the light bulb go off in my head. I've seen several different solutions to charging phones. So I've decided to try my luck at one. I hope you'll play along!
I hate all the cords and plugs needed today for all the
electronic gadgets in my life. If I had
it my way, there would be no cords or plugs.
Everything should just work and never stop. Batteries should be outlawed. But……until manufacturers agree with me and
reinvent these gadgets without all the wired attachments I have to deal with
them. Lately, I’ve seen several cute and
really smart ideas for chargers and the cords and since I’m always looking for
awesome ideas to solve storage issues and also great uses for my scraps and
stash I’ve decided to tackle a Cell Phone Station Pocket Organizer. Come and play along with me.
Cell Phone Station Pocket
15” x 6” quilted rectangleto 2 strips of 2 ¼” x WOF (width of fabric) strips
1 – Grommet
The first thing I did was sort through some of my stash to
find the right sizes I would need for the front and the back. Then a piece of
scrap batting. I found 3 – fat eighths
leftover from another project and decided they would work perfect. They all coordinated. I layered the three and pin basted.
Then I free-motion quilted them together in a simple stippling pattern.
Next I trimmed the quilted piece to a 15” x 6”
rectangle.
After determining how deep the pocket should be to
accommodate my cell phone and cord and how much room I needed at the top for
the grommet, (3 ½” inches from the top down to the top layer of the pocket) I
was ready to start stitching.
I then folded the unit back so that I had my 3 ½” at the
top.
Using a scant ¼” seam I stitched from the binding on one
side down, across the bottom and back up the other side stopping after tacking
the binding down.
I then added the binding starting at the bottom (fold). I
turned up a ¼” at the beginning, then stitched up the side, across the top and
down the other side again returning up a ¼” at the end.
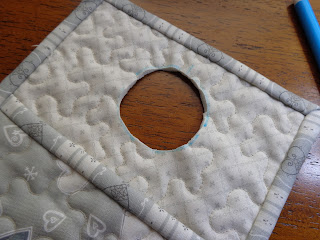
I cut out the marked circle.
Following the easy
instructions on the package I inserted the grommet


